
Ever wondered how some knife enthusiasts keep their blades razor-sharp without constantly hitting the sharpening stone? They’re likely in on an age-old secret: stropping. This practice, often overlooked outside of dedicated communities like woodcarvers and serious knife collectors, is a game-changer for maintaining a keen edge.
But what exactly is stropping? And why isn’t everyone doing it? Let’s dive in.
Demystified: Stropping Isn’t Sharpening
First things first: stropping is not sharpening. Think of it this way: sharpening removes material from your blade to reform the microscopic angle that makes your knife edge. It’s like reshaping a tiny mountain peak.
Stropping, on the other hand, is all about polishing that very peak. Imagine taking a dull, unpolished diamond and buffing it until it gleams. That’s what you’re doing to your knife’s edge. It’s a maintenance activity that can significantly extend the time between full sharpening sessions. For those who sharpen their own knives, that means saved time. If you outsource your sharpening, it translates to saved money. Who doesn’t love that?
Your Stropping Starter Kit: What You Need
Ready to give your blades the spa treatment? You’ll only need two main items:
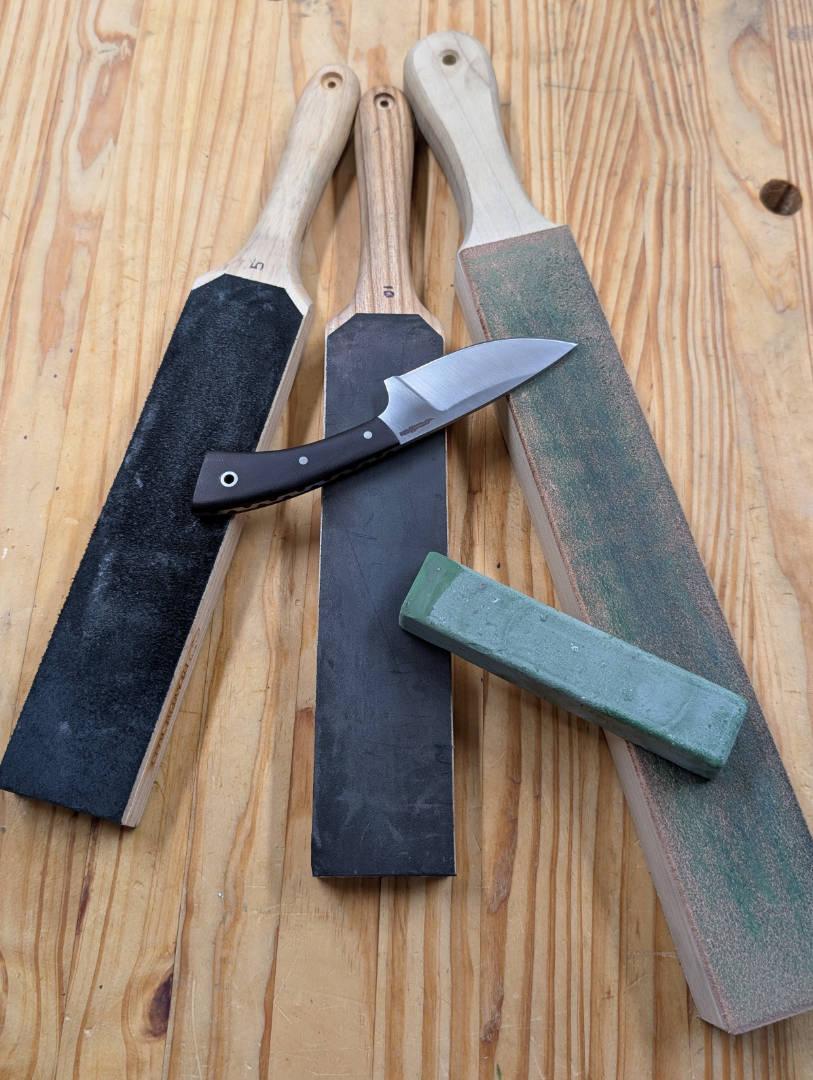
- The Strop: This is typically a piece of leather, usually glued to a flat, rigid surface like wood. You’ll find them with smooth sides up, rough sides up, or even both. While all can work, many (myself included!) find the rough side up to be the most effective for beginners. While you could embark on the rewarding journey of making your own strop, it’s easiest to purchase one. Amazon and many specialty stores are packed with options.
- Stropping Compound: Consider this your blade’s polishing compound – because that’s essentially what it is! Many pre-made strops come with a block of compound, often the familiar green variety. This is perfect for starting out. If you’re buying separately, you’ll encounter a fascinating world of chalks, pastes, and even diamond-infused compounds (yes, really!). For now, stick with the green stuff; it typically contains chromium oxide and aluminum oxide abrasives, offering a medium grit that’s ideal for our purposes. Think of different colors as different “grits” like sandpaper, but remember there’s no universal standardization. Green is a safe bet for general use.
Getting Down to Business: Applying Compound and Stropping Your Blade
Applying the stropping compound is a breeze. Just rub it onto the strop! If you’re using a chalk-like compound, ensure you get good, even coverage. For pastes, especially the potent diamond varieties, a tiny bit goes a very long way – always follow the manufacturer’s guidance here.
Now, for the main event: stropping your knife. The key here is to follow the edge angle of your knife. Different knives and types of blades will have varying angles.
The basic motion is the opposite of cutting. Imagine you’re trying to slice backwards along the strop. You want to slide the knife backwards, following the blade’s edge. The goal is to polish that very, very edge. Start with the knife at a very low angle, then slowly tilt the blade up until just the edge makes contact with the leather. Move the knife back and forth, ensuring you hit both sides of the blade along its entire length.
The Secret Sauce: Feel, Sound, and Light Touches
Here’s where the magic happens, and it’s all about feel and sound.
Start by moving your knife across the leather at a very low angle. Notice how it’s silent and smooth? That means you’re not quite at the edge. Now, slowly start to tilt the blade up. You’ll eventually hear and feel a slight scraping sound. This is your sweet spot! Your goal is to maintain the blade at precisely the angle where you just begin to hear/feel that subtle scrape. This confirms the very edge is making perfect contact with the leather.
If you tilt up too much, you’ll hear and feel a stronger, more pronounced scraping. This is too high, and over time, you risk rounding over your precious edge. Remember, you’re not trying to “rake” the blade; you want to follow the leather. Light passes are perfect. Avoid heavy strokes. You’re polishing, not removing material!
A half-dozen to a dozen passes on each side is usually sufficient. But honestly, if you’re stropping correctly, there’s really no such thing as too much.
Wash and Dry After
After stropping, be sure to wash and rinse your knife to remove any leather fibers and residual stropping compound. Don’t forget to completely dry it. For non-stainless knives, be sure to oil before storing away.
How Often Should You Strop?
This is entirely up to you, but generally, the more frequently the better. Stropping is a maintenance ritual. For your everyday culinary and kitchen knives, stropping every few uses can keep them in top form. For hard-use knives, like those used in wood carving, you might find yourself stropping every ten minutes during a carving session!
The payoff is immense: significantly less time spent at the sharpening stones or grinding belts. Embrace the strop, and enjoy a consistently sharper, more efficient blade!
 Wood Fire Workshop